
I think everybody has been there after some time:
- multiple python venvs for dozens of projects
- huge
requirements.txtfiles containing all dependencies of dependencies - JuPyter notebooks everywhere, including their dependencies
For the start of my PhD I decided to try to bring some order in the chaos of environments and dependencies by switching to pipenv. Furthermore, I show how to implement jupyter notebook style programming in a Neovim()/Oni() development environment.
pipenv
Pipenv is a tool that allows to manage project dependent virtual environments, while additionally enhancing reproducibility by using checksums of installed packages (Pipfile.lock).
It is the recommended package manager by http://www.python.org, is straightforward to install and also supports loading project specific environment variables using an .env file.
Virtual environments in pipenv are not stored in the repository of the project, also there are no additional files besides the Pipfile and the Pipfile.lock (these are actually good to have to ensure reproducibility). The strategy is to avoid installing packages outside of pipenv (for example using pip), which automatically ensures that all project dependencies are tracked and up to date. Overall pretty neat in my opinion.
On macOS with brew you can be up an running with Python 3 and pipenv using the following commands:
brew install python3
brew install pipenv
Afterwards, we can install JuPyter in the global Python3 environment (or the users Python3 environment by adding the --user flag) using:
pip3 install [--user] jupyter
Avoiding reinstalling JuPyter for all venvs
Now that we have the JuPyter installed in the global environment we don’t want to have to reinstall all the dependencies for each virtual environment/project we work on. The trick is, that we only need to install the JuPyter kernel in the individual virtual environments, and register these kernels in the global installation.
The kernel package that is required for a jupyter/IPython interface (notebook, QT Console, console) to communicate with an environment is ipykernel, which can be installed as an development dependency in pipenv (pipenv install --dev ipykernel).
Afterwards, the new kernel needs to be registered with the global JuPyter installation.
In order to make the whole process easier, I wrote added a small bash function to my ~/.bashrc to create a Python 3 environment, install ipykernel as a development dependency and register the new kernel for usage in the global JuPyter installation.
To get the same functionality, add the following lines to your ~/.bashrc:
init_python3_pipenv () {
   echo "Setting up pipenv environment"
   pipenv install --three
   echo "Installing ipython kernel"
   pipenv install --dev ipykernel
   # get name of environment and remove checksum for pretty name
   venv_name=$(basename -- $(pipenv --venv))
   venv_prettyname=$(echo $venv_name | cut -d '-' -f 1)
   echo "Adding ipython kernel to list of jupyter kernels"
   $(pipenv --py) -m ipykernel install --user --name $venv_name \
   --display-name "Python3 ($venv_prettyname)"
}
A new project can now easily be set up using:
mkdir ~/Projects/MyAwesomeProject
cd ~/Projects/MyAwesomeProject
init_python3_pipenv
JuPyter notebook style programming in Oni/Neovim
For the vim users out there, I will explain how you can convert vim into an interactive developing environment similar to working in a jupyter notebook or using an ide like spyder.
This setup involves launching an IPython kernel in a QTConsole, establishing a remote connection to the kernel using the nvim-ipy plugin and configuring the QTConsole such that it outputs the results of remote commands.
IMHO the result look quite acceptable:
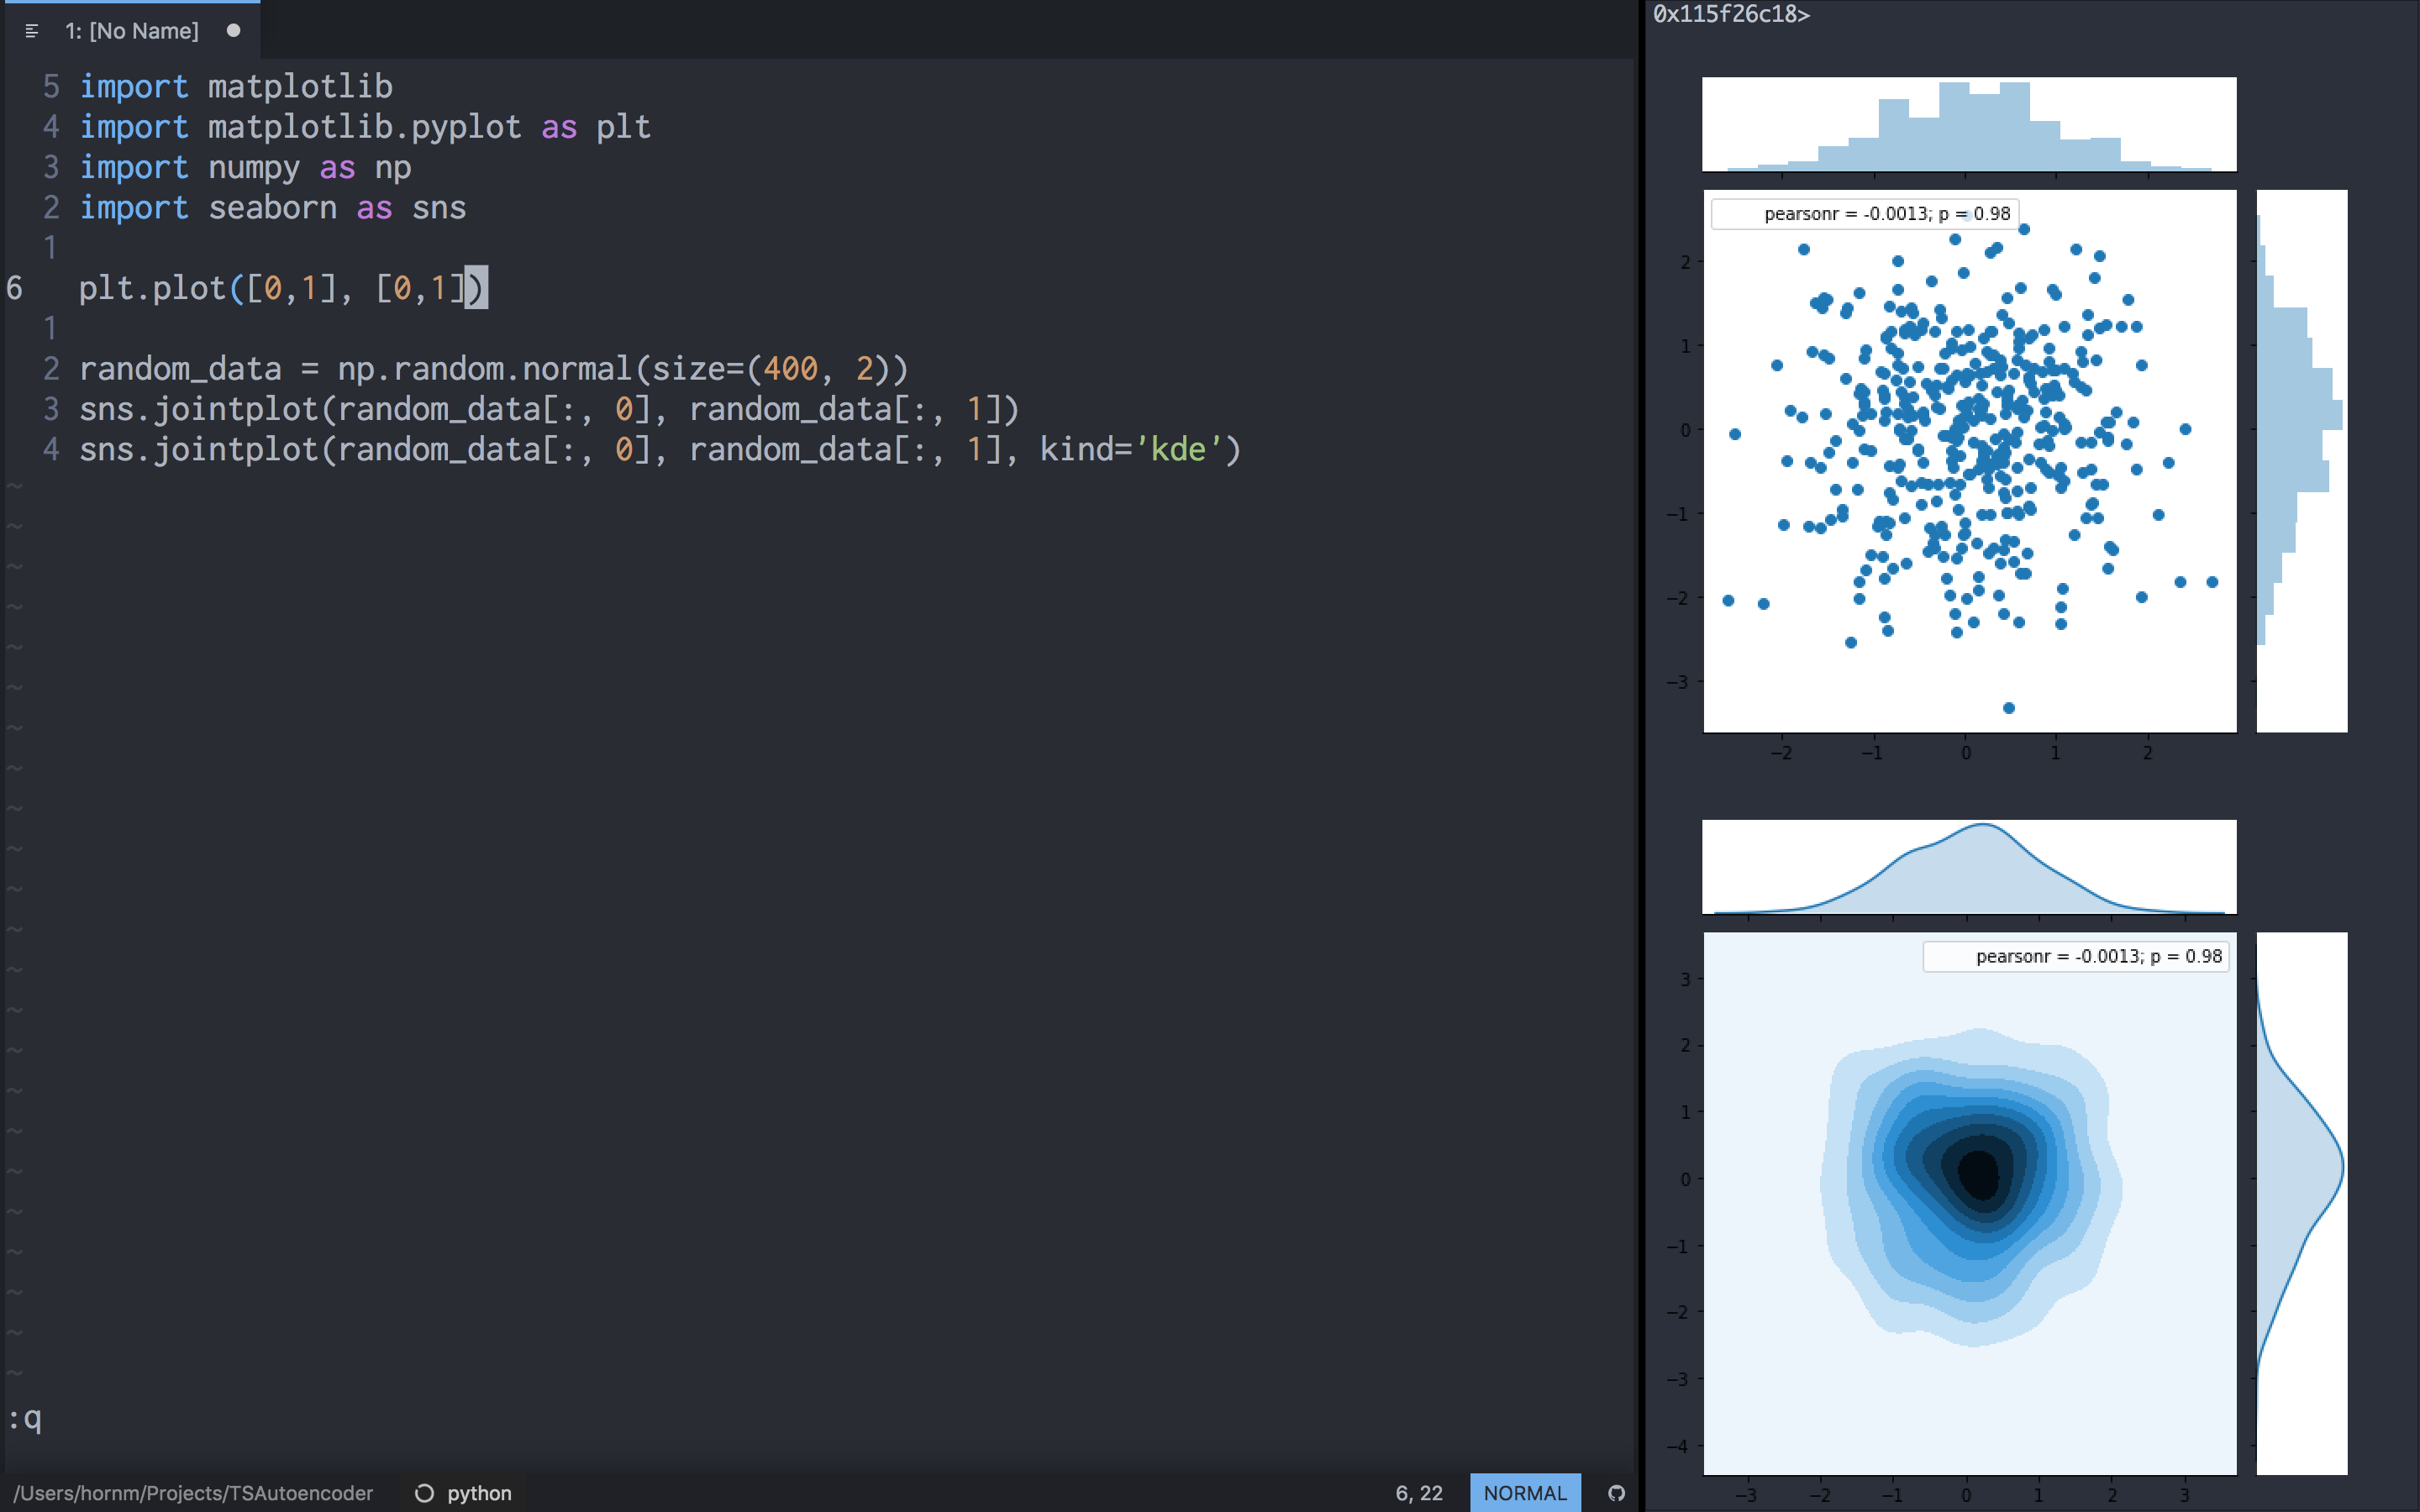
Running QtConsole from vim using correct kernel
The benefit of the QT Console is that the output of a command is directly visible, allowing interactive programming with intermediate plots and variable inspection.
On macOS, the dependencies (mainly QT) of the QT Console can be installed via brew. For other operating systems please refer to the QT console documentation. As I only use Python 3 for development on an macOS operating system, I got the QT Console up and running using the following commands:
brew install sip --without-python@2
brew install pyqt --with-python3 --without-python@2
For integration with vim I use the nvim-ipy vim plugin, which can be installed using your favorite vim plugin manager (I personally use vim-plug).
The following command rely on the installation of nvim-ipy.
To allow the QT Console to easily be launched using the correct kernel and from within vim, I defined the following vim functions in my init.vim
function! GetKernelFromPipenv()
    let a:kernel = tolower(system('basename $(pipenv --venv)'))
    " Remove control characters (most importantly newline)
    return substitute(a:kernel, '[[:cntrl:]]', '', 'g')
endfunction

function! ConnectToPipenvKernel()
    let a:kernel = GetKernelFromPipenv()
    call IPyConnect('--kernel', a:kernel, '--no-window')
endfunction

function! AddFilepathToSyspath()
    let a:filepath = expand('%:p:h')
    call IPyRun('import sys; sys.path.append("' . a:filepath . '")')
    echo 'Added ' . a:filepath . ' to pythons sys.path'
endfunction

command! -nargs=0 ConnectToPipenvKernel call ConnectToPipenvKernel()
command! -nargs=0 RunQtConsole call jobstart("jupyter qtconsole --existing")
command! -nargs=0 AddFilepathToSyspath call AddFilepathToSyspath()